
Thursday, November 29, 2012
Dreamweaver CAS CHristmas

Thursday, November 22, 2012
Clean and Simple Christmas
Happy Thanksgiving everyone. I just realized that it is Thursday and I need to put something on my blog. the theme this month is clean and simple and I certainly know about clean and simple. My creation today uses the Sm. Snowflake (LS 26) and the Antler Snowflake (LL 399) you may notice I use these stencils quite often.
 for this card I used the Molten Magic technique. First however I used the small snowflake and a lg stencil brush with Momento ink Teal Zeal and added snowflakes to the background. I then used Silver Metallic Paste to paste my snowflake. Remove the stencil and sprinkle with Metallic F/X: Sapphire, Glacier, Purple Satin and Moonstone. Heat with your heat gun. Then swiffer off the excess mica powders. I added rhinestones to the centers of each snowflake. Voila a CAS christmas card. I did this on another one of these cute Doddlebug Design cards. I hope you all take time to be grateful for all you have and the start of the Christmas Season. I am thankful for all the blessings I have been showered with and being on such a wonderful design team. I hope you take the time to visit the rest of the Dream team's blogs to see what they came up with this week.

Wednesday, November 14, 2012
Dreamweaver's Clean and Simple Christmas (CAS)
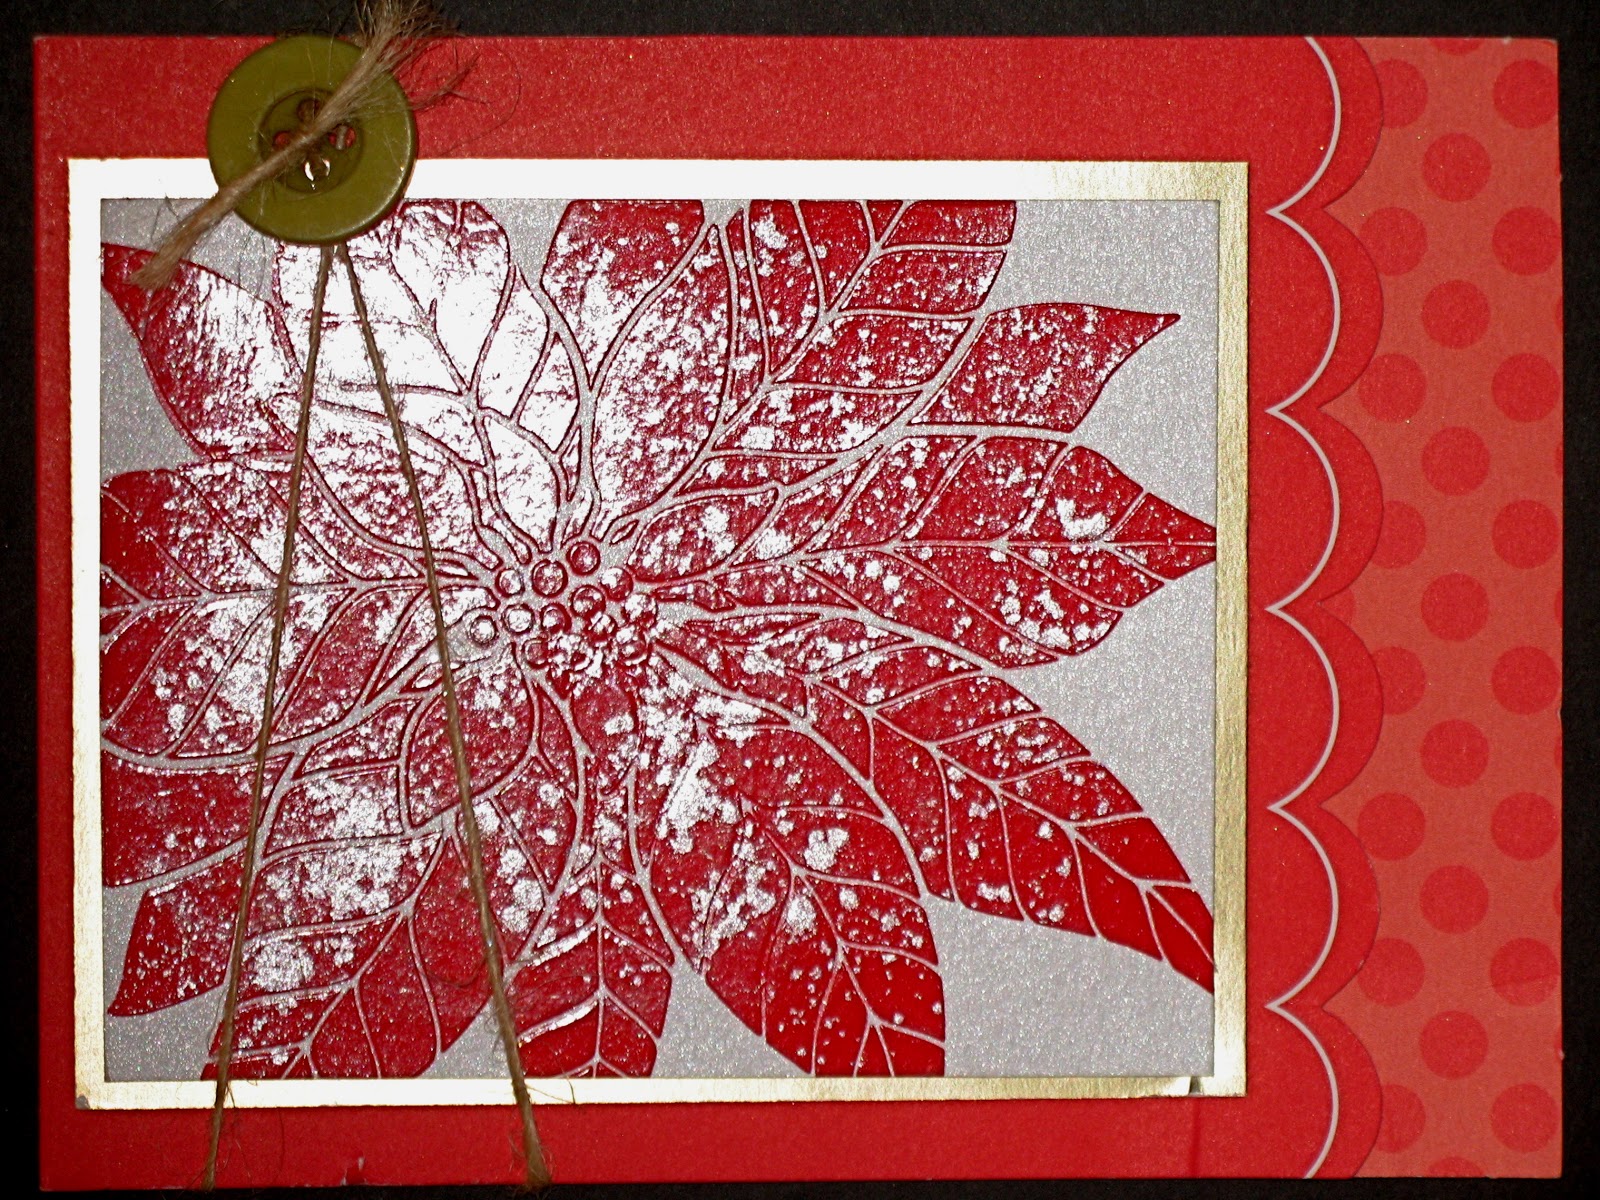
Hi all well it's Thursday again and that means inspiration from the Dream Team. I love Christmas but with my crazy schedule, if I want to get my cards out in a timely manner they had better be CAS. The card I chose to share with you falls into this category.
 I stared by using this great card from Doodlebug design, they are the perfect start for a card. I used Stardream Ice Silver card stock for the background of my poinsettia I taped the stencil down on all four sides then pasted the Lg.Poinsettia (LG 700) with Red Glossy paste (DRGP). I removed the stencil and Sprinkled in Metallic F/X: Moonstone. The hardest part about this card is letting it dry completely before you swiffer off the excess Metallic F/X. I use the big swiffer sweeper sheets and cut them into four pieces, they really work well for picking up excess glitter and mica powders. When th image ws dry I mounted it onto a mirror silver background and the n mounted it onto the Doodlebug card. For embellishments I added some twine and a button. Easy and Fun. Don't forget to send us your creations by using Mr. Linky on the Dream It Up! blog or send Lynell a picture using her e-mail located on the Dreamweaver website. Hope Everyone has a wonderful Thanksgiving.
Thursday, November 8, 2012
Grand Finale...Dreamweaver Stencils/Ranger Collaboration

We've now had four weeks of festively distressed fun playing with the Ranger/Tim Holtz Distress Powders along with our wonderful line of Dreamweaver Stencils and products. Huge thanks to Tim Holtz and the fab people at Ranger for sharing these four collaborative weeks with us, and providing the yummy shades of Distress Powders for us to create with. We've been inspired by the process, and we hope you have, too!
If you haven't won one of the prize packages yet, you still have one more opportunity this week as the set below is up for grabs to a random commenter on one of the Dream Team blogs.

If you've been following along each week, you've seen some gorgeous creations with these stencils and powders, so you should be all fired up to get distressed! If you've missed the first three weeks, check them out once you've made the rounds today:
My festively distressed project for this week is this:
 
I love the holiday season and these are two of my favorite stencils, Small Snowflake (LS 26) and the Antler Snowflake (LL399). I started my card by using white card stock and distressing the card with Tim Holtz distress inks, Bundled Sage and Spun Sugar. I then pasted the snowflakes using regular embossing paste which I then sprinkled with Worn Lipstick and Old Paper Distress Powders on the wet paste. I let this dry and then brushed the image with a fluffy brush which removed some of the particles leaving a somewhat rustic look to the snowflakes. I mounted the layer with the image onto a darker teal card stock and then onto a decorative layer. I added a tulle bow in pink and an embellishment pin that started out ivory and then I added color solution alcohol ink in Noble Fir to make it a nice teal color. This was a simple card to do and I needed to do something real simple this week because we just moved and I haven't found all of my Art supplies yet. So now it's your turn to get out there and create.
Don't forget to leave me some love before hopping to the rest of the Dream Team blogs:
|
Wednesday, October 24, 2012
Festively Fall Dreamweaver/Ranger Collaboration Week 2
Y
|


Wednesday, October 17, 2012
Festively Fall Dreamweaver/Ranger Collaboration

The Dream Team are so excited to have the opportunity to play along with some unique Ranger Products in the Tim Holtzline...specifically, the Distressed Embossing Powders! Our own Louise Healy demonstrated how fabulous these are with theDreamweaver Stencils when she created this card for a fun class at CHA Summer 2012:

Apparently, Tim Holtz agreed with all of us on this unique use of his product, so he very generously had Ranger (thanks, Patti!) send the team some samples to play and blog with. So...here we go!
Here's my post for today:
 My post today features the Pumpkins stencil(LL 515). Using Double sided mounting paper and the double glitter technique. Instead of using glitter however I used Tim Holtz Distress Powders in the following colors: Mustard Seed, Dried Marigold, Spiced Marmalade, Peeled Paint, Tea Dye and Weathered Wood. I sprinkled the powders using a straw that was cut on an angle and then when all the colors were where I wanted them placed I used my heat gun on the embossing powders. I then layered the card together using card stock in beautiful fall colors and decorative paper from BoBunny design. I really love the rustic look of the Distress Powders.
For the next four weeks, on our regular Thursday posts, we will be featuring the wonderful things that you can do with Tim's Distress Powders and Dreamweaver Stencils. Leave comments on each of the team blog posts for opportunities to win one prize package for each of the four weeks:
Don't forget to play along with the Dream Team's monthly challenges for more opportunities to win some great stencil designs! October's challenge is Festively Fall, and November is CAS (clean and simple) Christmas! Link your creations on the Dream It Up! blog, or email pics tolynell@dreamweaverstencils.com. Join us on Facebook as well! Lots of inspiration, and lots of fun!
|
Thursday, October 4, 2012
Festively Fall -Week 1
This month's theme is Festively FAll which leaves you open to al sorts of interpretations, What's your favorite thing about Fall? Mine is the crisp morning air, however I live in the Bay Area and we are having a mini heat wave so I guess I'll be waiting a few more days for those crisp mornings. Last week I forgot it was Thursday and forgot to post so this week I'm posting to cards. I'm using the same stencil for both, The Leaf Icons( LL471) this is one of my favorite stencils I use it a lot, it great for so many different techniques.


If you have any questions leave me a comment and I will be happy to answer your questions. Now just as last month there will be two winners of our challenge and you will get to pick a stencil of your choosing, so get to creating and link to Mr. Linky on the Dream it UP blog or e-mail a picture to lynell@dreamweaverstencil.com.
Happy stencilling,see you next week.
ed
Subscribe to:
Posts (Atom)