Wednesday, December 28, 2011

Thursday Dream Scheme's Happy New Year


This has been a busy week for me so I kept my design clean and simple. I started by picking out my paper I used a nice teal color from Coordinations and then I found some handmade paper that had pieces of gold metallic threads. I realized as I started to look at my stencils that I really don't have anything for New Year's so I decided to improvise. I used the Swirl Background stencil (LJ863 ). I used Brillance Galaxy gold. ink with a 1 1/4 stencil brush and brushed in the color on three of the corners. Then I took a piece of my teal card stock and the Celebrate stencil (LS90). I used Gold Metallic paste for the Celebrate and set it aside to dry. While I was waiting for the celebrate to dry I layered the handmade paper onto the teal card stock, wrapped the card with light teal tulle and then I added 2012 by using Thickers "rainboots" glitter stickers. Now I cut the celebrate to the size I wanted and then layered it onto a piece of gold card stock I used foam mounting tape to pop it off the upper left corner. Like I said clean and simple.
Looking forward to a great and creative New Year. Play along with our challenges by going to the Dream It Up blog and linky to Mr. Linky. Don't forget to go to the Dream Teams blogs and check out what they came up with this week. Happy 2012 to everyone!!

Thursday, December 22, 2011

Burgundy and Gold Dreamweaver Challenge

I really love this card. I love the rich color I was able to get in the background. I started out with the nativity stencil (LL3019) which I pasted in Metallic Gold on burgundy paper. While that was drying I got out the new Color Solutions alcohol inks that Dreamweaver has just released. Using a felt tool and felt from Ranger Industries I put a squeeze of Creme Brulee and Gold on the felt then I put just a drop of Darkest Brown and some of the thinner. I applied this to glossy card stock by twisting and turning the tool as I was applying the color, when I finished putting the color on I then went back with a little more thinner which gives it a marble look. Alcohol ink dries fairly quickly so I was able to use the Prince of Peace stencil (LX7004) right away and that was also pasted with Metallic Gold paste. I then layer everything onto gold card stock. As you can tell by my recent post I tend to be a clean and simple card maker. Congratulations to the new Dream Team members and I hope you have as much fun as the rest of us are. Now everybody check out the rest of the Dream Team creations and dont't forget to come back next week. I wish everyone a Merry Christmas.

Wednesday, December 14, 2011

Sketch Challenge with a Vintage theme.

This week's challenge was a hard one for me, because I really don't do vintage much. I started by picking out a piece of vintage looking paper from Graphic 45. I then decided to use the holly flourish stencil (LG 731) which I pasted on white card stock with Gold Metallic paste. I then pasted Merry Christmas (LS 92) in glossy green paste on a piece of kraft paper. When the green paste was dry I distressed the edges of the paper with Ranger distress ink Walnut Stain. I added some red tulle, and Ivory embellishment pin dipped it gold glitter and a felt flower.
Now go to my sister dream team members and see what they have come up with this week.

Thursday, December 8, 2011

Dreamweaver Free Challenge week


I love the Christmas season and while I'm just getting started with my decorating our little neighbor hood is in full swing. I don't know why but I always think of snow when the season starts, however the last time it snowed in Castro Valley I was 8 yrs old and that was a very long time ago. For today's post I chose to showcase one of my favorite stencils, the Antelope Snowflake (LL399).
I also used the Swirl background stencil (LJ 863).
The first thing I did was pick out the notecard color I wanted to use, this is a Memory Box notecard and the color is called Thistle, the color is kind of a gray green. After choosing the color I decided on the background stencil because the swirls remind me of how snow might fall. I started by using the Tim Holtz tool with blending foam and rouging in one of his new seasonal distress inks called Iced Spruce then when I had that done I took one of my large stencil brushes and added a little of the other new distress ink call Evergreen Bough. I wanted my snowflake to have that Thistle color so I started with Regular Embossing paste and added Glacier Blue metallic F/X this colors the paste a beautiful turquoise color so then I added just a pinch if Ivy Garden metallic F/X and got just the color I was looking for. You will notice that one side of the snowflake appears lighter then the other and this is because I used a sludge technique. While the paste was still wet I sprinkled a little crystal glitter on it to give the snowflake some sizzle. When the snowflake was dry I used my large stencil brush and just brushed in a little bit of the iced spruce distress ink around the edge of the card. I backed the layered background and the image with a darker card stock and the using mounting tape popped the snowflake off the background. This is a very clean and simple card to do, my very favorite kind of card. I urge you to play with the regular embossing paste and the Metallic F/X and see what colors you can come up with. If you want us to see your creations go to the Dream It Up blog and use Mr. Linky and don't forget to visit the blogs of my Dream Team sisters to see what they have come up with this week.

Thursday, December 1, 2011

Turquoise and Silver Dream Scheme Colorway


This colorway was really a challenge for me this week. With this colorway I would have used the snowflake or the ice skates but I've already used them in the last two posts and I really wanted to use a different stencil. So as I was looking through my stencils I found this stencil (LL3019) Nativity. I used the Dreamweaver Silver Metallic Paste on turquoise card stock and then sprinkled it with crystal glitter. I then took a piece of glossy card stock and used Color Solutions, the new artist grade alcohol inks just released, and did a marbling effect for the background layer.
I added silver card stock behind both layers and the layered it all onto a turquoise card. I then add some turquoise tulle to the card. It is a different look for a card I would send for Christmas but I have to say I really like it. Check out the rest of the links to the right to see what my Dream Team sisters have come up with. If you have a creation that you would like to share, go to the Dream It Up blog and link it to Mr. Linky. Hope you are all having a creative holiday season. Come back next week to see our newest creations.

Thursday, November 24, 2011

Happy Thanksgiving Dreamweaver Dream Scheme


Happy Thanksgiving Everyone. Today for me is a day of gratitude and thanks for all the blessings in my life, my family and friends. While here in California we don't have the distinct seasons that the East Coast and Midwest have, I have noticed the crisp mornings and the way the Japanese maple in my backyard has turned a beautiful fiery red. I chose to use this week the Leaf Icon stencil (LL471) and the Thank You 2 stencil (LM147) . I pasted these with Gold Metallic Paste (DGP). The paper I used was some paper I received in a kit from Club Scrap and has a lightly embossed paisley pattern in it. I was originally going to gold leaf the leaves but as the paste dried I noticed how the paste picked up the pattern in the paper, so I decided to leave it just as it was. Then I layered the papers onto brown card stock and then the background paper I found not to long ago. This card is really simple, but that's my style. I wish all of you a blessed Thanksgiving and a creative holiday.
If you are interested in being on the Dream Team go to the Dream It Up blog for more information and don't forget to check out the rest of the team blogs for hteir creations this week.

Thursday, November 17, 2011

Thursday Dream Scheme's - Sketch Challenge


I love winter, here in the East Bay Area we really don't ever get snow. However I do enjoy going to the mountains every once and awhile to spend some time in the snow. I love how quiet and pristine it gets. This week our sketch challenge is from Wendy ( she comes up with the greatest challenges). I started by layering Navy blue card stock onto silver card stock. I used the antelope snowflake stencil(LL399), the sm. snowflake stencil(LS26) and the Winter stencil (LM296). On the navy blue card stock I glue down a strip of snowflake glitter paper from American Crafts POW collection. I then pasted the snowflakes with Silver Metallic paste on the navy background. I cut a small piece of silver card stock, then pasted the word winter using regular embossing paste mixed with Sapphire Metallic F/X. I added some crystal glitter while the paste was still wet. I let everything dry and then layered everything together. I added 3 crystal rhinestones.
Now don't forget to visit the blogs for the rest of the team and if being on the Dream Team is something you think you might enjoy, click here to find out how to make your Dream happen.

Friday, November 11, 2011

Dreamweaver Christmas Card Class


To all my students today, thank you for being such a great class. I hope you all had a lot of fun, you did great on the cards. You know how to get a hold of me if you need a questions answered. here are the pictures of the samples.

Thursday, November 10, 2011

Free Callenge Thursday Dream Scheme


Today I chose a card that I truly love and am teaching this weekend in two of my classes. It uses the new Color Solutions alcohol inks that Lynell has just released. To start I used glossy paper and then used a marbling technique with the alcohol inks. The ink colors were Blue velvet, Iceburg and Thistle, I slso used the thinner/ cleaner solution after I got the main color on. As you can see this technique gives you some great background contrasts. The stencil(x7004) also a fairly new release was perfect for this technique. To paste this I used the paste threader(LM2010) it gives a great smooth application for these larger stencils. I used White Glossy Paste to paste with, it takes a while to set, so set it aside and go do something else for a few hours so you don't do what I do and smear your card. Anyway once it was dry I simply layered it onto Lavender Star Dream card stock. I kept looking at it all day to see what embellishments I might want to use, and finally decided it really stood on its own.
This card is so easy to do that I will be using it as one of my own x-mas cards this year.
Have you been creating this week, if you would like to share go to the Dream It Up blog and link to MR. Linky so we can see your creations.
Have you ever thought you would like to be on the Dream Team? If you have then click here
to get the information. Do it now the call closes on November 30th and we would hate to miss your creations. We are looking forward to new members on the Team. Don't forget to check us out next week and check out the creations of the rest of the Dream Team listed to the right.

Thursday, November 3, 2011

Dreaming in Black and White


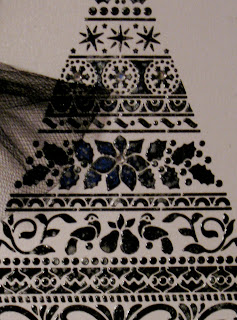
For My post today I added a little silver for some bling. I chose the Ornate Christmas Tree LX7003 that Lynell released at CHA I haven't used this stencil before, so I was excited to get it out and use it for this post. The technique I chose to use was one that I really enjoy using glossy paste and mica powders. The cardstock that I used for the image to be pasted on is called Ice Silver and has a silvery shimmer to it. I taped the stencil on all four sides then using the Paste Spreader (LM2010) and Black Glossy Paste (DGKP) I spread the paste over the stencil. The paste spreader does a great job giving you a nice even image. After I removed the stencil I sprinkled some Moonstone F/X (04) over some areas of the image. Once the paste dries and glossy paste takes some time, at least and hour unless you have a warming tray to use ( I have to set my images away or I'm constantly wanting to touch it). Then take a small piece of a Swiffer Sweeper and brush away the excess Metalllic F/X. If you look at the closeup picture you can see the spots of white on the black glossy paste, this is the fun part of this technique. I can be doing 10 of the same card but each one will be just a little different. I then cut down the image area and layered it on black card stock. I added a strip of silver glitter paper with snowflakes on the side and the used black tulle for the ribbon and last but not least I took one on the corsage pins( TIPI- ivory) that Lynell sells and used the new Sizzling Silver Color Solutions alcohol inks to paint the pearls silver and then added silver micro fine glitter from Glitter Ritz.
DO YOU LOVE DREAMWEAVER STENCILS ? ARE YOU CREATIVE ? If you answered yes to either of these questions you maybe interested in being on the Dream Team. A call has been put out for new Dream Team members click here for more information.

Now don't forget to check out the Dream Team blogs to see what everyone has been up to this week and don't forget to come back next week to see what we've been up to. Also don't forget to LIKE us on Facebook.

Tuesday, October 18, 2011

Dream Scheme Thursday-Free Challenge week

I'm starting to think about the upcoming holidays and the cool weather. I have this really fun blue polka dot glitter paper that I wanted to use so I chose the recently released ice skates (LL3017) this week challenge. I embossed the image by using my big shot. Then I rouged in Momento London Fog using a large 1/2 inch stencil brush(NHB 1/2) to add color to the skates. Then using a smaller stencil brush I stippled on glue (Palette Stamp and Stick Glue Pad)
and then sprinkled with Stampendous Crystal glitter. I then removed the stencil and rouged the corners with the 1/2 inch stencil brush and London Fog. I mounted this onto navy blue paper and then added a crocheted snowflake with a metallic blue brad.
This simple card has lots of glitz and will probably be the card I send out this Christmas.
I hope you all have had a creative week and join us again next week. Don't forget to check out the blogs of the rest of the team and see what they have been up to this week.

Monday, October 17, 2011

Halloween Class at Jazzy Crafts


Come join the fun as we create these fun Halloween cards. We will be using copic markers and some fun embellishments.

Jazzy Crafts
October 19th
class starts at 6:30
call to make your reservation now.

Thursday, October 13, 2011

Dreamweaver Colorway Challenge / Pink and Black


Pink and black are great colors to work with but I've been thinking Fall the last couple of weeks, so when I sat down to work on this challenge it took me a minute or two to come up with what I wanted to do. It all of a sudden came to me that this is Breast Cancer Awareness month and I have a kitchen full of cake pops that are being sold for a donation to Breast cancer research. Lynell released a Hope character during the summer CHA and I thought that would make a great card. So for all my friends who have fought this awful disease and survived this card is for you. I started with a black card I then layered the card with pink polka dot paper from DCWV and then I added a bow of black tulle. I know you would think I would assemble the card while my paste was drying but I was kind of in one of those backward moods. I then took Regular Embossing Paste and added Pink Blaze Metallic F/X to get a pretty color pink. I pasted the Hope Symbol (LL3018) with this mixture and let it dry. Then when it was dry I repositioned the stencil and daubed some glue over the top of the image (Palette Stamp and Stick Gluepad ) and brushed on the Pink Blaze Metallic F/X to add some shimmer. I used mounting tape to pop this layer and then added one of the cute hatpins that Dreamweaver sells for a little extra bling. This was a pretty simple card but fun to make.
Don't forget to stop by the other Dream Team Blogs and see what they came up with this week, the are a very creative group of ladies. HOPE to see you here next week and hope everyone has a very creative week.

Thursday, October 6, 2011

Dream Scheme Thursday-Free Challenge week

Hi all ... I sorry this didn't get on my blog as early as it should. I'm here is Tucson Arizona for the week visiting with my mom and my sister. this card is one that I really enjoyed doing, t was one of the stencils I was given for a challenge. This stencil is one of the new backgrounds that was launched at CHA summer it's the triangle weave. I started by doing the bottom layer, I rouged in adirondack inks by ranger using lemonade, butterscotch, lettuce and eggplant. Once I had the color in I left the stencil in place and pasted with translucent paste, this paste gives the color a kind of tile look and really pops the color. Next I took another piece of paper and rouged in the same colors on this one however I did not do the paste, I took the celebrate stencil and pasted with black glossy paste. I then let everything dry while I picked out paper in shades that I liked for layering. Once the paste was dry I layered the card together and added a orange bow and pearl hat pin.
Thanks for stopping by and Happy Thanksgiving to our Canadian neighbors. Don't forget to check out the blogs of the rest of the Dream Team and leave us all a comment. See you all next week.

Thursday, September 29, 2011

Wednesday class at Scrapbook Territory

Had such a great time on Wednesday with the 9 ladies who took my Faux Cross-stitch class. Everyone was able to finish 4 cards and most left with four or five more images to use to create cards. It was a really warm day but everyone seemed to have fun and they were a extremely creative bunch. I love when you show a technique and everyone takes off and adds there own creative touches. Thanks ladies for a wonderful time, look forward to seeing you all soon.

Monday, September 26, 2011

Great Classes at Scrapbook Territory

I had two great classes that I taught on Saturday at SCrapbook Territory. Faux Watercolors and Simple cards. I really had a great group of students and I want to thank them for taking those classes, here are the pictures I promised to put on my blog. If you have any questions feel free to e-mail me anytime.

Wednesday, September 21, 2011

Dreamweaver Free Challenge week


I can't believe that it's the Fall Equinox already, that means Halloween is on the way. I love Halloween. So I thought it would be fun to show you all a card that I made with that thought in mind. I started with the OptoCheckerboard background using the double glitter technique. You really want to soap the back of the stencil well with vegetable soap ( Handmade Coconut Soap) I always take a small brush and use it to get any of the soap out of the holes in the stencil. Once this is done I place the stencil on double sided mounting paper then sprinkle black glitter ( Glitter Ritz) over the paper. Once I have done this I then remove the the stencil and sprinkle with crystal glitter. I then used the Jack O' Lantern (LL 531) stencil and used the sludge technique with Matte Orange and Matte Yellow paste. I let everything dry and then I layered it all together.Halloween is so much fun, carving pumpkins, candy and all the fun decorations not to mention the costumes. The picture above is one of my favorite costumes. That's my friend Terrece and I dressed up for Halloween. Don't we look fabulous. Hope you are all having a great 2nd day of Fall play along with us by going to the Dreamweaver Dream It UP blog and posting on Mr. Linky. Don't forget to visit the blogs of the rest of the Dream Team and see what sweet treats they are offering today. See you all next week.

Thursday, September 8, 2011

Designer Free Challenge Week


As fall is approaching in many area, the California bay area is just starting to really get some warm weather, it has been in the 80's and 90's this week, sure has felt good. I'm starting to think about the holiday cards now but here is one last tribute to summer that I will be teaching in a class I have coming up. The stencil I used is call the Hibiscus pair (LL478) and one of my favorite stencils. It is great for using with the Faux Crosstitch technique that I will be teaching in class. I started with a plain green notecard and added a couple of papers that coordinated with each other for the background. In this case the papers came from BoBunny's Barefoot and Bliss. I taped my stencil to white cardstock and then added light background colors with a stencil brush in this case light yellow and green, I then gently lifted the stencil and inserted the faux cross stitch screen underneath the stencil. Now I start adding darker color to give it the cross stitch look. I used one of the darker colors around the edge of the card and mounted it to a yellow layer of cardstock and popped it off the card. This card is simple, clean and easy.

Make sure to take a tour of what the other dream team designers have done this week and don't forget to come back next week.

Monday, September 5, 2011

The Winner of my Blog Goodies

The winner of my blog goodies chosen by randon.org is : SherylH. Sheryl please send your address to Lynell Harlow at lynell@dreamweaver stencils.com. Thanks for playing along with us on our HOP.

Friday, September 2, 2011

Blog Hop with Woodware UK and Dreamweaver Stencils

This week the Dreamweavers design team is parting with the UK Woodware design team to show you innovative ways to use our wonderful Dreamweaver stencils and supplies. All week long watch as we use our stencils (which are fabulous for paper crafting ) in a whole new way. We have posts all week long starting Monday August 29th to September 3rd. At the end of our celebration each designer will randomly select a winner from all her blog comments to recieve a free Dreamweaver stencil. We look forward to you partying along with us.


Here's my entry for today:


I am definately a California Beach girl so I decided to do this cigar box with a beach theme that I will give to my girlfiend for her birthday. I started by painting the box green, then using Dreamweaver's stencil LJ901 (mosaic background) I covered the top using Adirondaack pigment inks in Juniper, Denim and Eggplant. I used a corner of paper from Seaside Retreat by Webster's pages which I torn and then adhered to the left side of the box using Golden Matte Medium. I also punched out some dictionary pages which I added in the same manner.
I then used Golden's Clear Tar Gel that I mixed with Metallic F/X - Kiwi to make sea grass in the lower right corner, to the sea grass I added three small shells. When this was dry I then taped stencil LM181 (seahorse) to the box and pasted with regular embossing paste. I decided to use the Faux Cloisonne technique for my seahorse, so after the paste was dry I repostioned my stecil over the image and pounced in pigment ink. While the ink was still wet I removed the stencil sprinkled the image with UTEE shook off the excess and heated the image with my heat gun. I repeated the process adding more color until I was happy with the way the color looked. Last I added metal element using stencil LM106 ( scallopped shell) with copper meal from Mercart that I ran through my Big Shot. I also added a trinket pin from the Tim Holtz collection with a piece of twine to which I added some beads and I finished with some tinted glass bubbles and Washi tape aroung the bottom of the box.

All stencils, Metallic F/X, Embossing paste and Utee can be purchased from the Dreamweaver retail site.

You can find all supplies you need right here:


http://www.woodware.co.uk./ or


http://www.stencilwithstyle.com./


your next stop along the hop is to Jane at:


http://janeelizabeth-flowergirl.blogspot.com/


That's it! Hopping is easy and fun. If you missed the other days of our hop or are having any touble linking to the sites on this blog, please go to the Dream It Up blog in the list to your right and click there for a master list of all the blogs posted each day.


Thanks for stopping by.


.


Thursday, August 18, 2011

Colorway Challenge Dream Scheme Thursday

I know that the colorway challenge is craft, ivory and red. I had a problem this week I created a fun card for my girlfiends birthday in just such colors, took pictures of it to put on my blog this week then gave the card to her yesterday. Last night I went to do my blog and my computer won't boot up, nothing is on the screen, I will be taking it to the computer doctor today. So I'm posting this card today It has ivory and craft but no red. This card was done using the new cameo stencil (LL 3017). I pasted the cameo using glossy black paste, while the paste was still wet I sprinkled in some MEtallic F/X amber glow and moonstone, just a little aroung the edges of the hair and collar. I distressed with Tim Holtz Distress ink after the design was dry, the color I used was Tea Dye. The paper I used in the background was Steam Punk by Grapic45 which I layered onto a light craft cardstock layer and then onto a black card. Now go to the sidebar with the links to the rest of the Dream Team and see what they have been upto this week and don't forget to come back next week.


Wednesday, August 10, 2011

Thursday Dream Scheme's - Free Challenge

This week is a free challenge for our dream team. I chose to use one of the new background stencils. The Houndstooth background stencil (LJ 913) I chose to use as both part of the background and also as the background on the fan. For the background I pasted with white glossy paste and sprinkled in Metallic F/X in Kiwi and Purple Satin. Then for the fan I rouged in the background houndstooth design in Eggplant (Adirondack Ink by Ranger)I also used the same color on the edge and spine for the fan. I used the Bamboo Stencil (LL 533) for the focal point on the design I rouged in Old Olive (Stampin UP) then I used Clear Embossing Ink and sprinkled the design with UTEE then heated the design with my heat gun. On a piece of Aubergine cardstock I pasted the chinese symbol for Sympathy (LS 53) in white glossy paste and used Metallic F/X Kiwi and Purple Satin. I layered the Aubergine rectangle on to olive green cardstock and cut the background with the chevron print to fit the rest of the card. I used green suede ribbon over the seam. I then cut out the fan and popped it off the card with mounting tape.Now that you have been to my blog, please check the blogs of the rest of the design team, I'm sure that you will great inspiration there as well and if you want to play along post to Mr Linky on the Dream It Up blog.

Wednesday, August 3, 2011

Dream Scheme Thursday-sketch challenge

It's sketch challenge week, and I love do sketch challenges Not creating them but doing them. I believe that Deborah created this challenge. I love turquoise and teal type colors with green and so that is what I chose to use for this week. I used the morning glory crest stencil (LL 461) and the triangle weave background stencil( LJ 912). To do the morning glory I rouged in the following colors from Rangers Adirondack pads: Aqua, Pool and Stream starting with the lightest color, For the Leaves I used Stampin UP's Old Olive and then added some Stream in a couple of areas. I used Aqua to distress the edges of the circle. For the Background pieces I used Worldwin's Med Awesome Aqua cardstock and rouged in Adirondack Stream. The other two corners were printed cardstock from TPC Studios. After the color was in on the Morning Glory I pasted the image with Dreamweaver Translucent Paste.Please leave a comment on my blog and then go on over to see what the other team members have come up with this week. If you would like to play along go to the Dream It Up blog and link up to Mr. Linky and Let us see your creations. See you next Thursday and happy creating.

Wednesday, July 27, 2011

Dream Scheme Thursday-Free Challenge week

This is free challenge week and I'm using one of the new stencils introduced at CHA. The gear background was so perfect, I don't know why but I just love gears. Anyway this came in handy for me because my daughter's boyfriend is really into sprint trithalons and he just had a birthday. For this card I started out with pewter metal that I purchased through Dreamweaver. I used the Gears Stencil (LJ 911 ) this is one of the new background stencil. I cut the metal 41/2 by 5 3/4 then I ran it through my Big Shot to emboss it. I sanded it to give the gears a used look. Then I used Ranger Alcohol Inks for the background, the inks I used were
Meadow, Butterscotch and Expresso. I then used the bicycle stencil (LL 592) which I embossed with Gold Metallic Paste( DGP ) onto black cardstock. The papers I used for layering were gold metallic paper and antique gold metallic paper. This was a great card for a guy.
Now you need to go to the rest of the Dream Team blogs and check them out because I'm sure I'm not the only one focusing on the new stencils. Then if you want to play along with us go to the Dream It UP blog and post some of your creations using Mr. Linky. We look forward to your visits so give us some comments to let us know that you have dropped by. See you next week.

HOT- HOT -HOT


This is a class that I will be teaching at Scrapbook Territory On August 28, at 10:30. We will be using Greeting Farm stamps for this one, Bo Bunny's Barefoot and Bliss paper, and Copic markers. Of course will add a little bling. come join me for some fun.

Friday, July 22, 2011

Luca and Marcie class/ Lala Land Kids


On sunday from 2:00 - 5:00 I will be teaching this class at Jazzy Crafts in Castro Valley. These cute kids are done with Copic Markers. we hope to see you in this class.

Wednesday, July 20, 2011

Dream Scheme Thursday-Monochromatic color challenge


I really loved this challenge, I started by going thru my usual stash of paper...then I remembered that I have this awesome stash of paper from Club Scrap that might be just what I was looking for. I really thought this paper was great because it was kind of a collage type background. I used the Bamboo Crest (LL 596) which I taped onto the paper centering it under the word synchronize. Using Mellow Moss ink from Stampin UP i rouged the ink onto the paper I then used a Jumbo dauber to cover the design with clear embossing ink ( Versamark) I removed the stencil and covered the design with UTEE and then heated with my heat gun. I repositioned the stencil back over the image and added more ink to darken the areas I wanted shading in. Again I used clear embossing ink over the image and removed the stencil this time using regular clear embossing powder over the image and heated that with my heat gun. To my monochromatic sage card I added a gingham ribbon and three Dots (Foliage By Hero Arts). this was such a fun card to do simple but I like the way it tuned out. Check out the cards from my design team sisters to see what they came up with this week. I know some of the girls are with Lynell this week at CHA in Chicago and they are releasing some new designs that we may be showing on our blogs soon....SO STAY TUNED TO SEE WHAT'S NEW.

Sunday, July 17, 2011

Classes Sunday at Scrapbook Territory

Simple Cards with copic Markers


Faux Watercolors: a different way to use your copic markers.


Wednesday, July 13, 2011

Thursday Dream Scheme's - Sketch Challenge

This is my take on this week's challenge. I used the seashells border (LL 536 ) For the background I rouged in Adirondack shell pink and then I also distressed the edge of the paper. Next I used the Sand Dollar stencil I rouged in Adirondack Hazelnut and the pasted with Dreamweaver Translucent Paste, then sprinkled a little crystal glitter or the wet paste. I hand printed "Listen" in the corner. I added Hero Arts Dots in the upper left corner and bordered the card w/ Spica Atyou glitter pen - Sand. I hope you are all having a fun summer and If you would like to get creative and play along Go to the Dream IT Up blog and use Mr. Linky to add your creation. Now don't forget to go to the other design team blogs to check out the fabulous creations that have been created.

Thursday, July 7, 2011

Thursday's Dream Scheme's- Free Challenge week

This card was one that I really enjoyed making, It was not my normal kind of card. I first started with a background paper that was already distressed and using the Lg. Cathedral Window stencil (LJ 808) pasted with regular embossing paste. I then used the Sm. Cathedral window stencil (LJ 909) over the vase (LM194 ) and using Tim Holtz Distress inks Stormy blue replecated the same pattern in the vase as in the background. I then pasted the vase with translucent paste and when it was dry I cut it out. I then layered the card, popping the vase off the nacy blue cardstock and added Prima flowers and Just the Edge (Bazzill) butterflies which I distressed again with the Stormy Blue. As most of you know I usually do bright simple cards so this monochromatic card was different for me. I will be doing some more in the future. Now hop on over to see what my Dream Team sisters Have been up to this week and leave us a little comment to tell us what you think.

Wednesday, June 29, 2011

DREAMWEAVER DREAM SCHEME THURSDAY


It is Thursday again and this weeks challenge is a colorway challenge...purple and yellow. I seem to be on a water theme this month, maybe because I love the beach. Here in Northern California the beach is a place you go to enjoy walking along the shoreline it's really to cold to swim in, unless your one of those crazy surfers who has a wet suit. But it is a place where I like to go to just realize that there is definately something far greater then I am who rules the world. Anyway I used the wave background (LJ 838 )and pasted my card with White Matte Paste. The card was from Hero Arts - Aubergine. I used a light yellow card stock for the word Summer (LM 294) To get the lighter to darker shade I started by rouging in Ranger Adirondack Lemonade and then towards the bottom I rouged in Butterscotch. I then Pasted the word with Dreamweaver Translucent Paste. When the background was dry I repositioned the stencil over the pasted image, pounced glue over the entire surface and using a paintbrush added Metallic F/X in Moonstone, Purple Satin and Sapphire. If you would like to play along got to the Dream It Up blog and link your creation onto Mr. Linky and while your at it visit the rest of the Dream Team blogs to see what they have been up to this week.